현재 프로젝트에서는 Discord 기반 소통이 이뤄지고 있습니다.
매일 반복되는 출결 체크, 데일리 스크럼 피드백, 상황 공유 요청을 효율적으로 관리하기 위해 알림봇을 만들면 좋겠다고 생각했습니다. 봇을 서버에 추가하는 건 생각보다 무거운 작업이기 때문에, AWS Lambda와 Discord Webhook을 사용해 가벼운 알림봇을 만들었습니다.
준비물
AWS 계정, Discord 서버 내 Webhook Manage 권한
Webhook (봇) 만들기
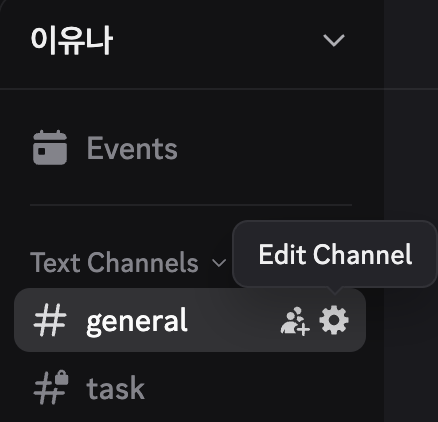
채널 옆 채널 옆 설정(⚙️) 버튼을 클릭합니다.
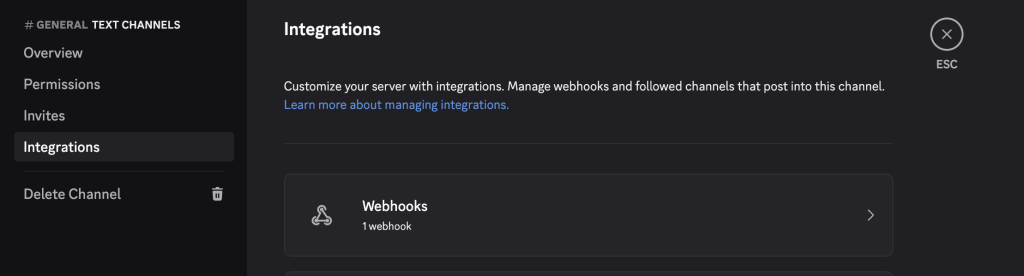
Webhooks를 눌러 Webhook을 만들어 줍니다.
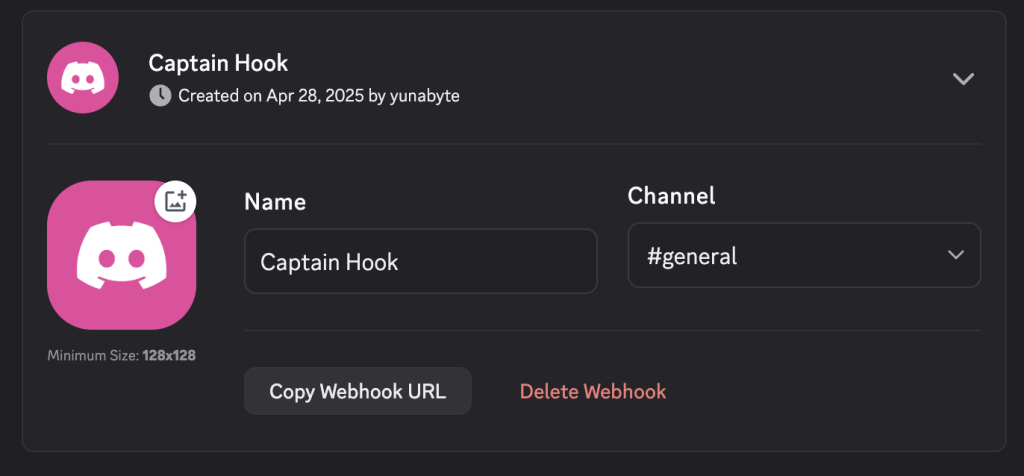
Webhook의 이름, 아이콘, 활동 채널을 설정하고, “Copy Webhook URL” 버튼을 눌러 URL을 복사해둡니다.
AWS Lambda 설정하기
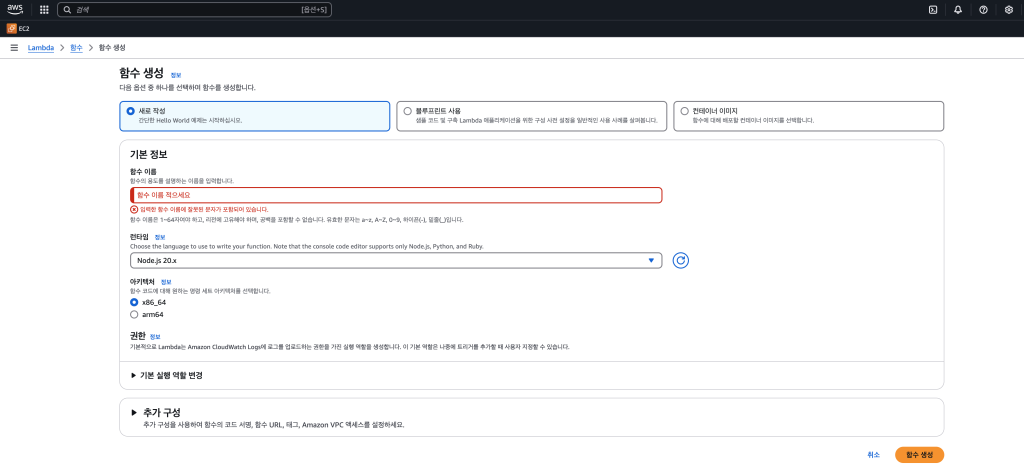
런타임을 Node.js.20.x로 설정한 뒤
람다 함수를 생성합니다.
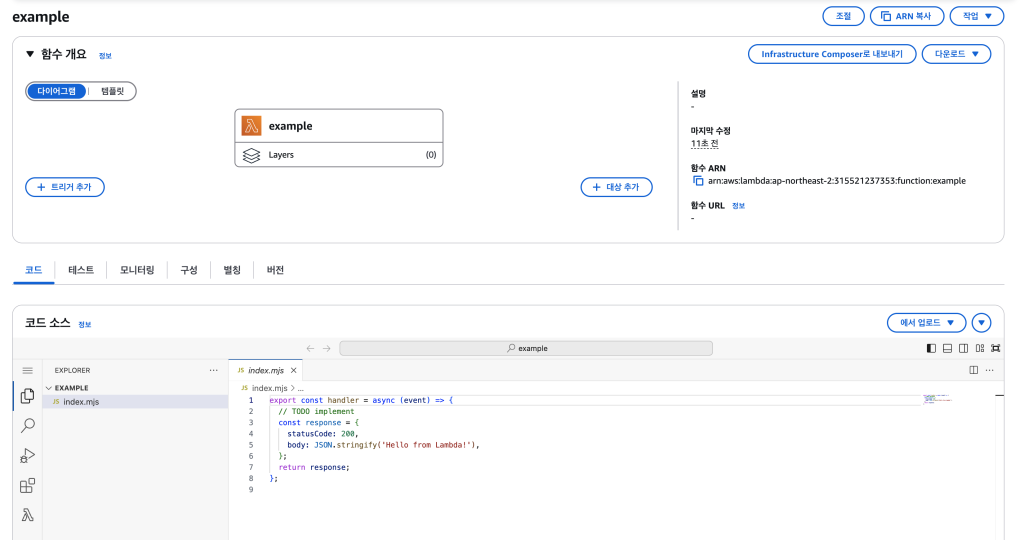
이런 화면이 뜨면 성공!

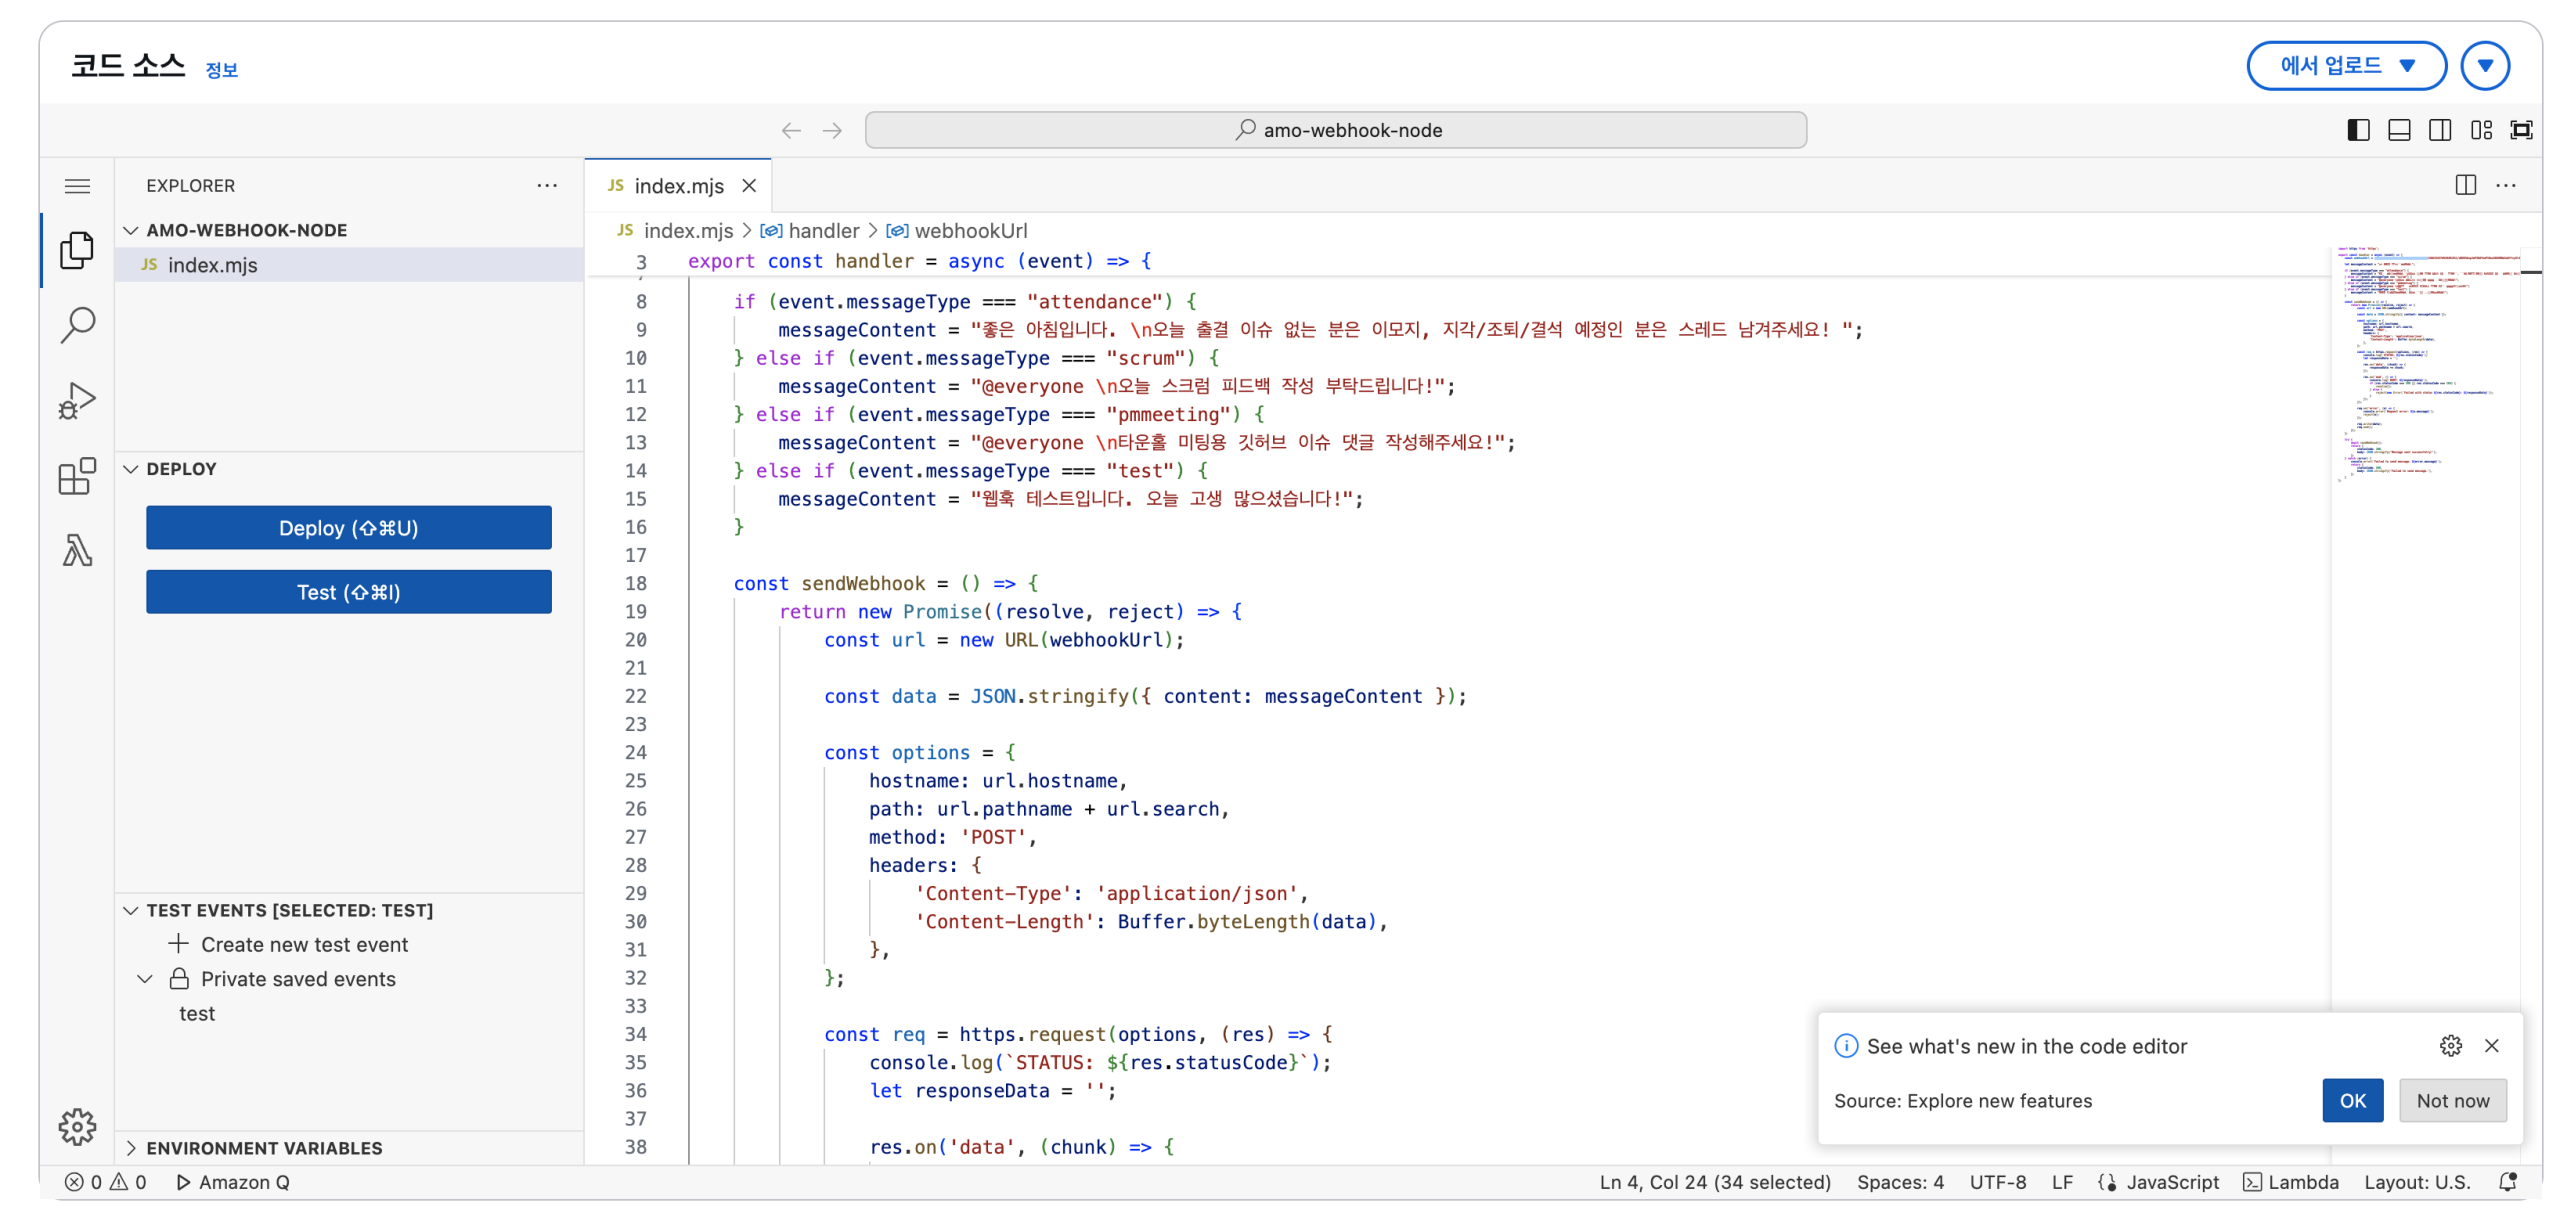
index.mjs 파일에 아래 코드를 입력합니다.
import https from 'https';

export const handler = async (event) => {

  const webhookUrl = "https://discord.com/api/webhooks/아까복사한WebhookURL"

    let messageContent = "👋 기본 메시지입니다.";
   // 메시지 타입과 내용은 상황에 맞게 변경하세요.
    if (event.messageType === "attendance") {
        messageContent = "좋은 아침입니다. \n오늘 출결 이슈 없는 분은 이모지, 지각/조퇴/결석 예정인 분은 스레드 남겨주세요! ";
    } else if (event.messageType === "scrum") {
        messageContent = "@everyone \n오늘 스크럼 피드백 작성 부탁드립니다!";
    } else if (event.messageType === "pmmeeting") {
        messageContent = "@everyone \n타운홀 미팅용 깃허브 이슈 댓글 작성해주세요!";
    } else if (event.messageType === "test") {
        messageContent = "웹훅 테스트입니다. 오늘 고생 많으셨습니다!";
    }

    const sendWebhook = () => {
        return new Promise((resolve, reject) => {
            const url = new URL(webhookUrl);

            const data = JSON.stringify({ content: messageContent });

            const options = {
                hostname: url.hostname,
                path: url.pathname + url.search,
                method: 'POST',
                headers: {
                    'Content-Type': 'application/json',
                    'Content-Length': Buffer.byteLength(data),
                },
            };

            const req = https.request(options, (res) => {
                console.log(`STATUS: ${res.statusCode}`);
                let responseData = '';

                res.on('data', (chunk) => {
                    responseData += chunk;
                });

                res.on('end', () => {
                    console.log(`BODY: ${responseData}`);
                    if (res.statusCode === 200 || res.statusCode === 204) {
                        resolve();
                    } else {
                        reject(new Error(`Failed with status ${res.statusCode}: ${responseData}`));
                    }
                });
            });

            req.on('error', (e) => {
                console.error(`Request error: ${e.message}`);
                reject(e);
            });

            req.write(data);
            req.end();
        });
    };

    try {
        await sendWebhook();
        return {
            statusCode: 200,
            body: JSON.stringify('Message sent successfully!'),
        };
    } catch (error) {
        console.error(`Failed to send message: ${error.message}`);
        return {
            statusCode: 500,
            body: JSON.stringify('Failed to send message.'),
        };
    }
};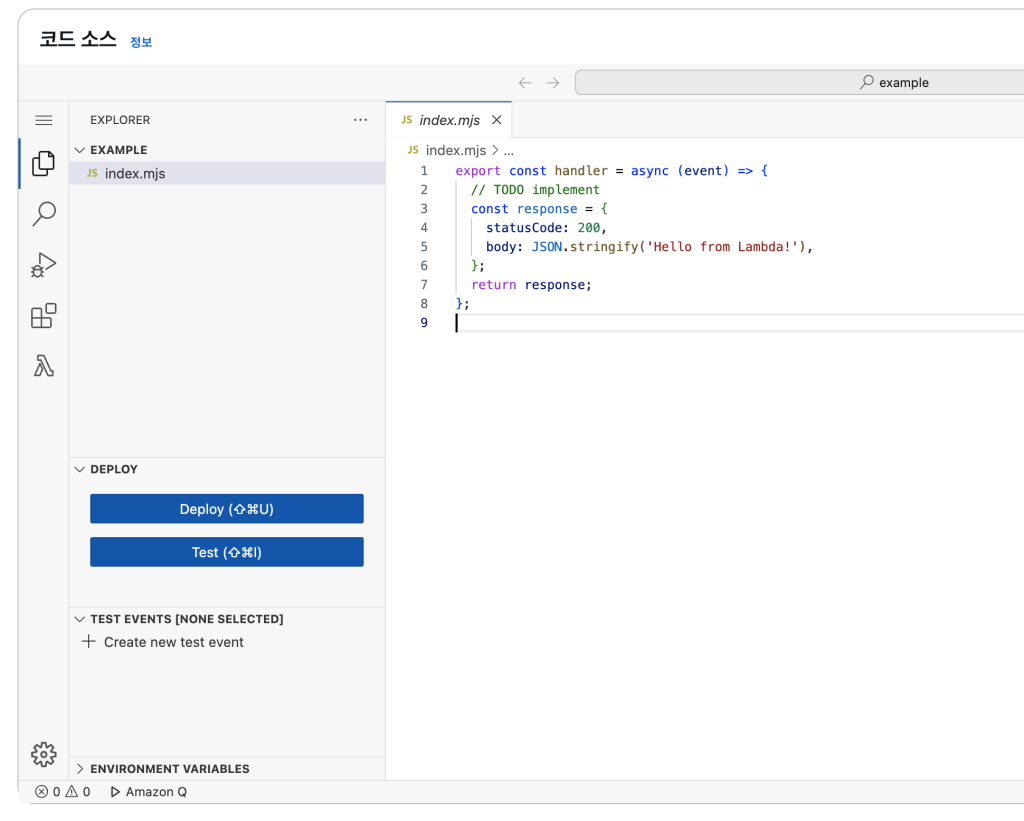
좌하단 Deploy 버튼을 클릭합니다.
AWS EventBridge 스케줄러 만들기
이제 정해진 시간에 특정 메시지 타입의 메시지가 전송되게 합시다.
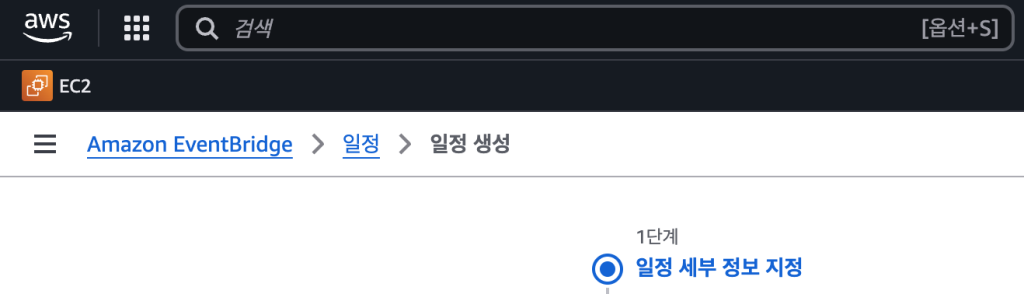
AWS EventBridge → 일정 → 일정 생성을 차례로 클릭하고, 알아보기 쉬운 이름을 지정해 줍니다. 각 일정에는 하나의 스케줄(메시지 타입)만 등록 가능합니다.
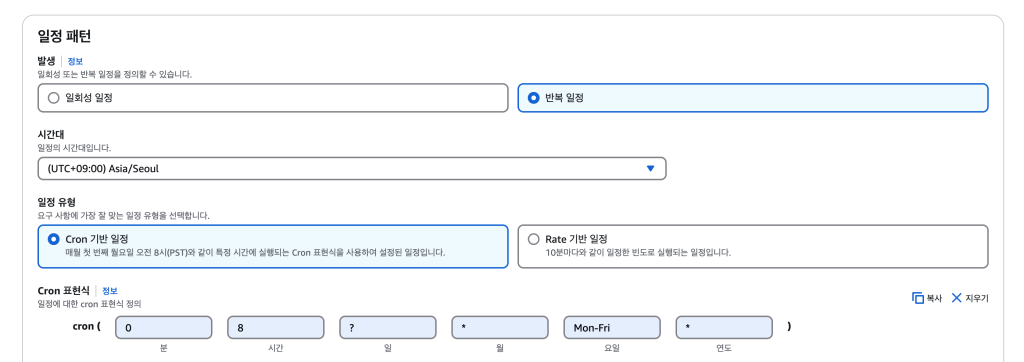
일정 패턴을 다음과 같이 설정합니다.
cron 표현식으로 0 8 ? * Mon-Fri * 은 ‘월-금 08시’를 의미합니다.
메시지를 보낼 시간을 지정한 뒤 다음으로 넘어갑니다.
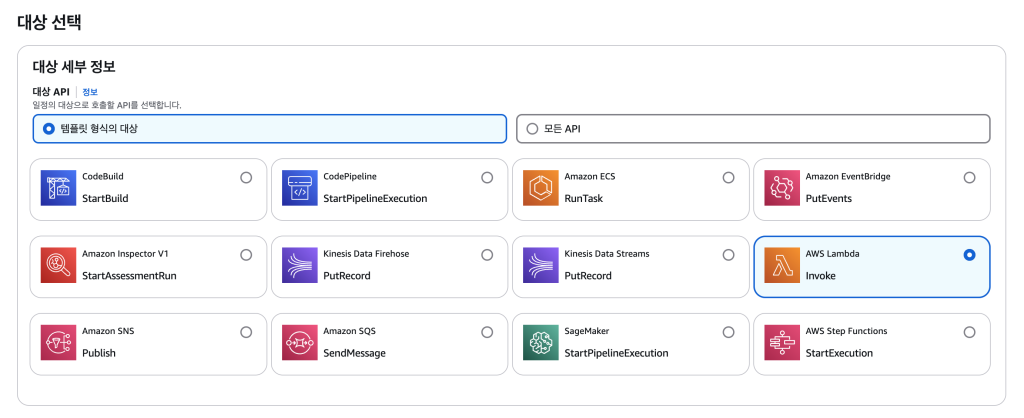
대상(Target)으로 Lambda를 선택하고,
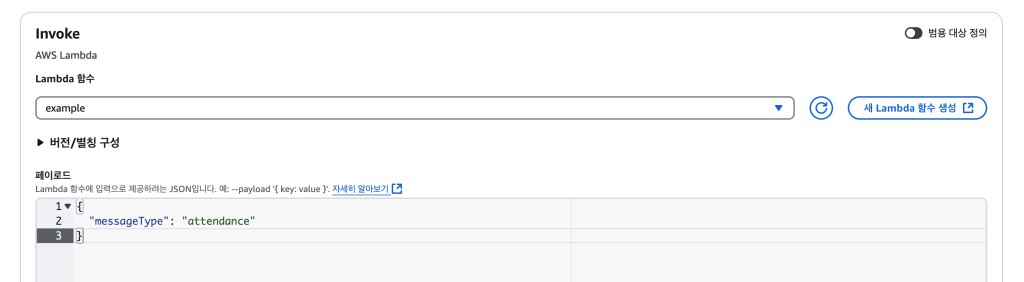
방금 만든 Lambda 함수를 선택하고, 페이로드에 아래 코드처럼 타겟을 입력해줍니다.
{
  // 설정한 cron 기반 시간에 보낼 메시지의 messageType을 적어줍니다.
  "messageType": "attendance"
}
이제 계속 다음을 눌러 생성해주면 끝!
이제 다른 알림 스케줄을 반복해서 만들어주면 서버비 0원으로 디스코드 알림봇을 굴릴 수 있습니다.
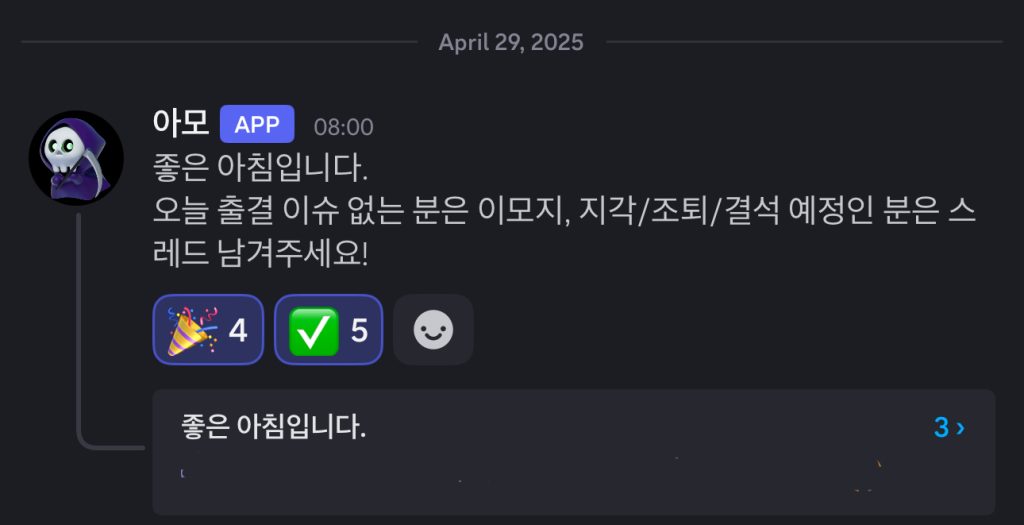
프로필 사진은 토스 이모지 ㅎㅎ 오늘 첫 출근한 헤비메탈전사 비서 아모입니다. 저희 서비스 이름이 ‘모아’라서 ‘아모’로 지었어요!
![[KakaoTech] 이론기간 회고 | 기술에 대한 명확한 이해와 반복숙달](https://icecreamzoa.com/wp-content/uploads/2025/03/image-6.png)
답글 남기기